How to change PHP versions and settings using PHP Selector
This article describes how to change the PHP version, settings, and loaded extensions in cPanel using the PHP Selector.
Table of Contents
Changing the PHP version
A2 Hosting servers support multiple versions of PHP. To change the PHP version used for your account, follow these steps:
- Log in to cPanel.If you do not know how to log in to your cPanel account, please see this article.
- Open the PHP Selector:
- If you are using the Jupiter theme, on the Tools page, in the Software section, click Select PHP Version:

If you are using the Paper Lantern theme, in the SOFTWARE section of the cPanel home page, click Select PHP Version:
If you do not see the Select PHP Version icon, your server does not support this feature. - If you are using the Jupiter theme, on the Tools page, in the Software section, click Select PHP Version:
- cPanel displays the current PHP version. To change the PHP version, in the Current PHP Version list box, select the version that you want to use, and then click Set as current. The new PHP version takes effect immediately.
Changing PHP settings and extensions
In addition to changing the PHP version from cPanel, you can change various PHP settings. You can enable and disable PHP extensions, as well as configuration directives such as allow_url_fopen, error_log, and many more.
To change your PHP settings, follow these steps:
- Log in to cPanel.If you do not know how to log in to your cPanel account, please see this article.
- Open the PHP Selector:
- If you are using the Jupiter theme, on the Tools page, in the Software section, click Select PHP Version:
If you are using the Paper Lantern theme, in the SOFTWARE section of the cPanel home page, click Select PHP Version:
If you do not see the Select PHP Version icon, your server does not support this feature. - If you are using the Jupiter theme, on the Tools page, in the Software section, click Select PHP Version:
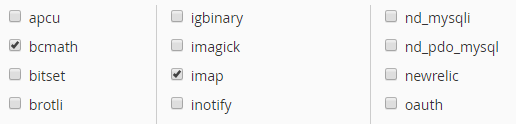
On the Extensions tab, select which extensions you want to enable for the current PHP version:
- To enable an extension, select the check box next to the extension name.
- To disable an extension, clear the check box next to the extension name.
- Selections are saved automatically.
To reset the extension list to the default configuration, click in the top right corner.To change settings for the current PHP version:
- Near the top of the page, click the Options tab.
- Click the value next to the setting that you want to modify.
- Depending on the type of setting, a list box may appear with predefined settings that you can choose. Or, a text box may appear so you can type the value:

- Changes are saved automatically, and take effect immediately.
When you modify a setting, a Reset to default link appears beneath the setting label. Click the link to change the setting back to the default value.
Article Details
- Level: Intermediate
Grow Your Web Business
Subscribe to receive weekly cutting edge tips, strategies, and news you need to grow your web business.
No charge. Unsubscribe anytime.
Did you find this article helpful? Then you'll love our support. Experience the A2 Hosting difference today and get a pre-secured, pre-optimized website. Check out our web hosting plans today.